Compliance Pro – Permitting Feature User Guide
Introduction
This guide provides step-by-step instructions for using the permitting feature in Compliance Pro, covering role setup, permissions configuration, permit types - ICRA, ILSM, and PCRA, notifications, tracking, and approval processes.
Accessing the Permitting Module
-
Login to TheWorxHub.
-
Click Settings.
-
Go to Users > Roles & Permissions tab in Compliance Pro.
/Compliane Pro-1_1023x494.png)
Understanding Roles and Permissions
Default Role
The Infection Control Board Member role is a new role created as part of the Permitting in the STANDARD ROLES section. This role has basic viewing permissions by default.
Customize Permissions
-
Navigate to Settings within the Permits tab. *
NOTE Only users with Compliance Pro permissions will see the Permits tab
-
Assign roles as needed, ranging from Managers, Supervisors, to Technicians, depending on the facility.
-
Permission Levels:
-
View Permits: Allows users to read permits.
-
Add Permits: Grants permission to read and add permits.
-
Can Approve Permits: Assigns approval capabilities.
-
4. Users with Permit tab access will see all permit settings, ensuring standardization across the team.
Permits Types
There are three types of permits in the Permits tab.
-
Infection Control Risk Assessment (ICRA): This is required when work could potentially introduce risks. (E.g., Ceiling tile removal or Wall demolition.)
-
Interim Life Safety Measures (ILSM): This is required when a life safety system or asset is taken offline. (E.g., Turning off a Fire Extinguisher or Sprinkler system for renovation.)
-
PCRA: PCRA is totally customizable so clients will all have different forms based on how they build them.
-
Custom Permit: The Custom Permit feature allows users to create and manage personalized permit types in addition to standard ICRA, ILSM, and PCRA permits.
Setting-up Permits
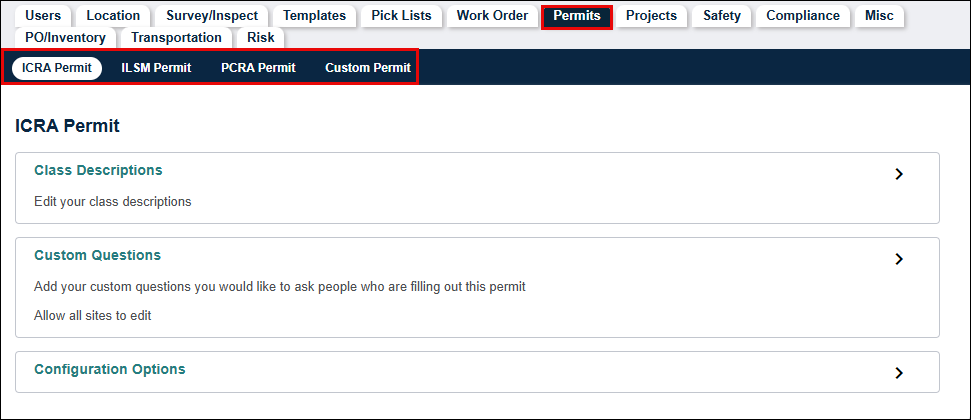
ICRA
-
Class Descriptions:
-
Define risk levels under ICRA permits and add custom descriptions (up to 4000 characters) for each class.
-
Use formatting (bold, italics, bullets) to enhance content clarity.
-
Default classes are five and 5th class is optional depending on facility.
/Compliane Pro-3_739x656.png)
-
-
Custom Questions:
-
Add specific questions that comply with your facility’s policy requirements.
-
Question Types: Yes/No, Open Response, or Yes/No/Not Applicable.
-
-
Configuration Options:
-
Class System: Select a 4 or 5 Class System based on facility protocols.
-
Permit Requirement Overrides: Enable for minimal-risk tasks if needed by your facility.
-
Class Overrides: Allow manual adjustments to risk class if auto-assigned classifications do not align with standards.
-
/Compliane Pro-4_919x450.png)
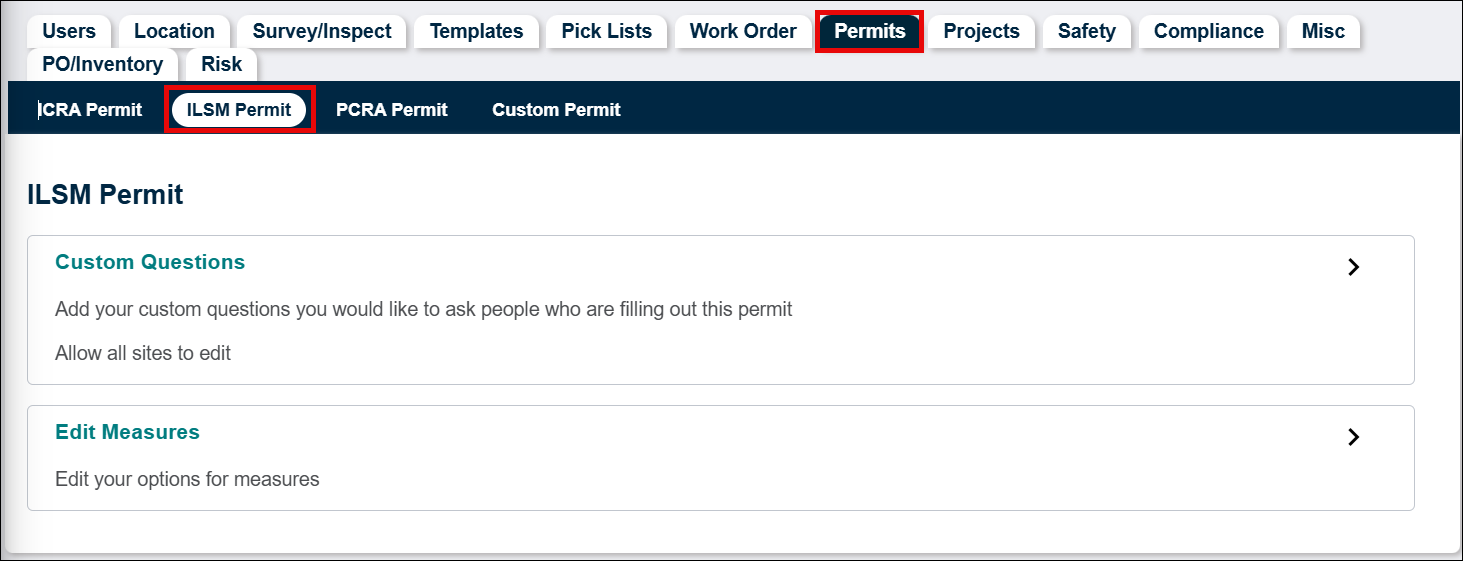
ILSM
-
Custom Questions: Add your own custom questions to the ILSM permits.
-
Edit Measures: Manage the list of measures that can be assigned to ILSM permits.
-
Library of Standard Measures: Create and access site-defined measures in the system's library for actions such as daily fire extinguisher checks or alternative safety procedure. Users can create, edit, reorder, or remove measures as needed, ensuring flexibility and adherence to safety standards.
-
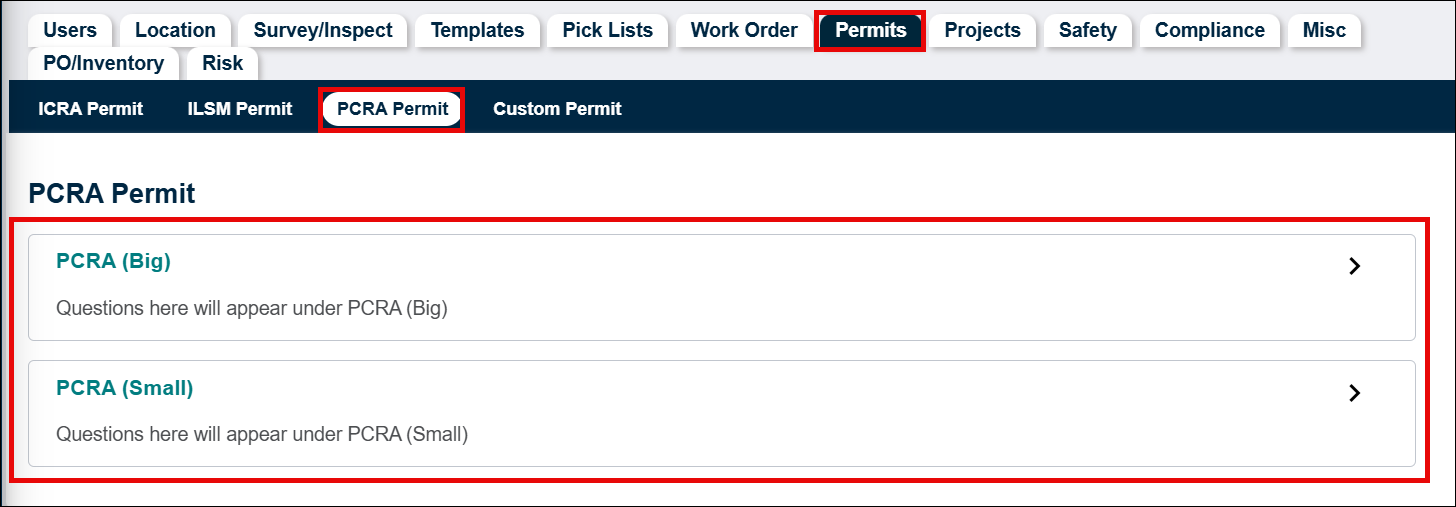
PCRA
-
PCRA can be attached to both Work Orders and Projects; however, ICRA and ILSM/ALSM can only be added to Work Orders.
-
PCRA is completely user defined, unlike ICRA and ILSM/ALSM, PCRA does not have default question.
-
Types of PCRA:
-
PCRA (Big): For large scale projects that typically include more questions and more procedures.
-
PCRA (Small): For smaller to more medium scale projects that might not require as many questions.
-
-
Each version of PCRA will be treated as individuals, with their own Categories, Questions, and Default Reviewers.
-
Categories: It allows users to group questions that are for the same topic, build the permit with each category representing a separate page in the permit flow. Users can sort and edit categories.
/Compliane Pro-7_531x498.png)
-
Default Reviewers: PCRA allows users to predefine reviewers. Users can identify reviewers who they would like to be added automatically on every PCRA permit they create. Default Reviewers can be removed during the permitting process and others can be added.
/Compliane Pro-8_770x163.png)
-
Example: PCRA permit within TheWorxHub, all questions are user defined so each site will look different.
/Compliane Pro-9_856x537.png)
-
PCRA new option for users: Users have a unique option with PCRA and that is to save their progress and finish the permit later. Users can save incomplete versions of their permit at any point within the permitting process, and we will save an incomplete permit for the user.
/Compliane Pro-10_748x222.png)
-
Update to projects: As a part of permitting, we are updating the projects space to accommodate permits. This change will only be seen by those who have the Compliance Pro Module.
/Compliane Pro-11_1030x360.png)
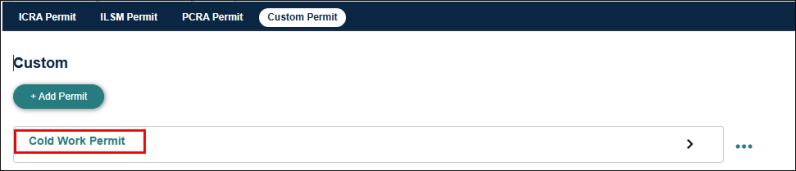
Custom Permit
To add permit, follow these steps:
-
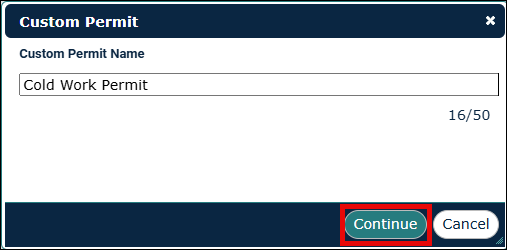
Click +Add Permit button.
The Custom Permit dialog box appears. -
Enter the custom permit name for example, “Cold Work Permit,” then click Continue.
NOTE The name can be up to 50 characters.
-
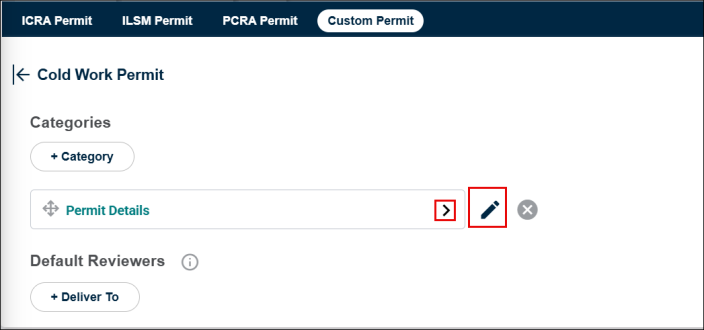
On the Custom page, click anywhere on the Permit name for example, Cold Work Permit to open it.
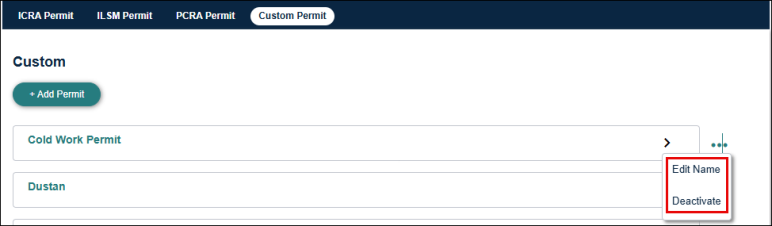
How to Deactivate and Reactivate Permit
-
To edit the permit name or deactivate the permit, click the ellipsis icon (…).
-
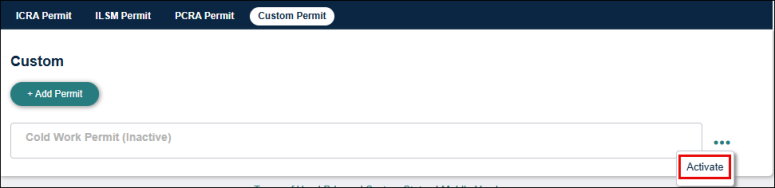
To reactivate a permit, click the ellipsis icon and select Activate.
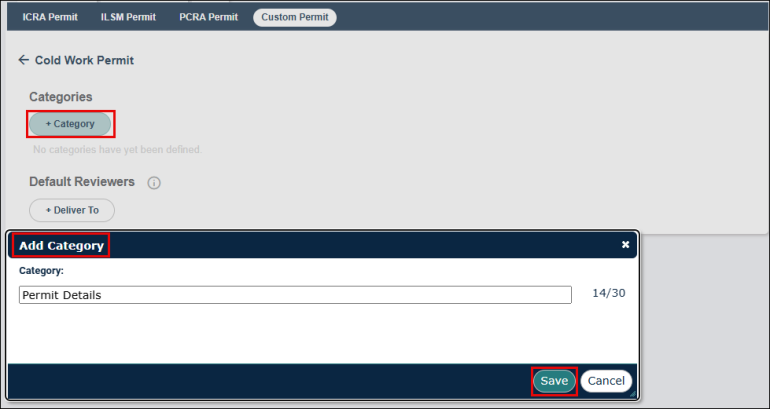
Categories
It helps you group questions by topic. Each category creates a separate page in the permit flow. You can sort and edit categories.
To add a category:
-
Click the +Category button and enter the category name for example, “Permit Details”.
-
Click Save.
NOTE You can add multiple categories.
Adding Questions in a Category
You can add descriptions and questions directly within each category.
-
Click the > icon.
NOTE To edit a category name, click the
 icon.
icon. -
Provide a description or information in the text field for example, “Answer all questions marked as required”.
-
Click + Add Question button.
-
Enter your question and select the appropriate question type from the drop-down list.
-
Click Save.
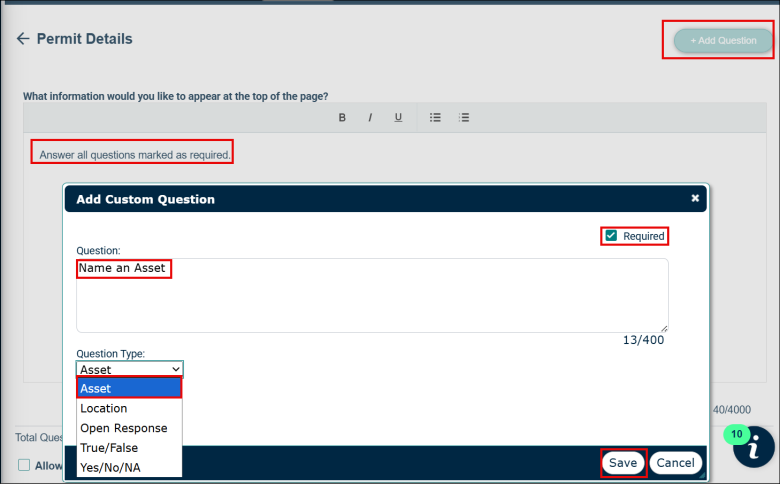
NOTE Each question type has its own purpose.
Asset: In answer enter the asset’s name.
Location: In answer enter the asset’s location.
Open Response: In answer write a detailed answer.
True/False: In answer select True or False.
Yes/No/Na: In answer select Yes/No/Na.Default Reviewers
Custom Permit allows users to predefine reviewers. Default Reviewers can be removed during the permitting process, and others can be added.
To add default reviewers:
-
Click +Deliver To button and enter the reviewer’s name that must be in the drop-down list.
NOTE You can add multiple default reviewers.
Click icon to remove a reviewer.
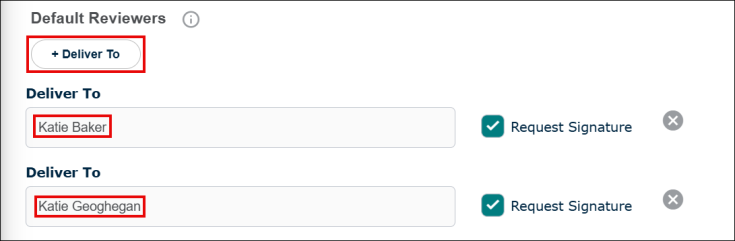
-

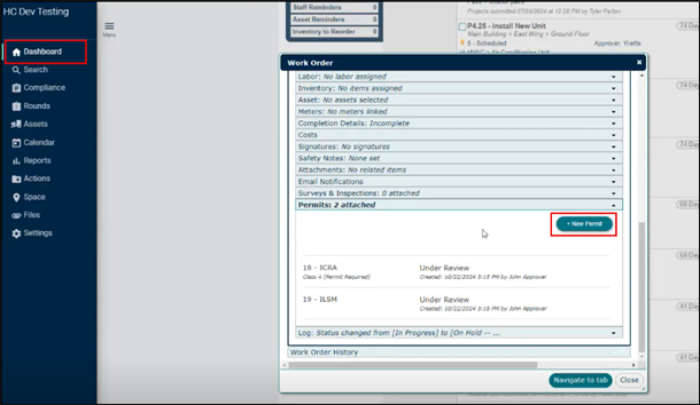
Creating Permits for Custom Permits
-
Go to Dashboard, click Work Order, then select the + New Permit button.
-
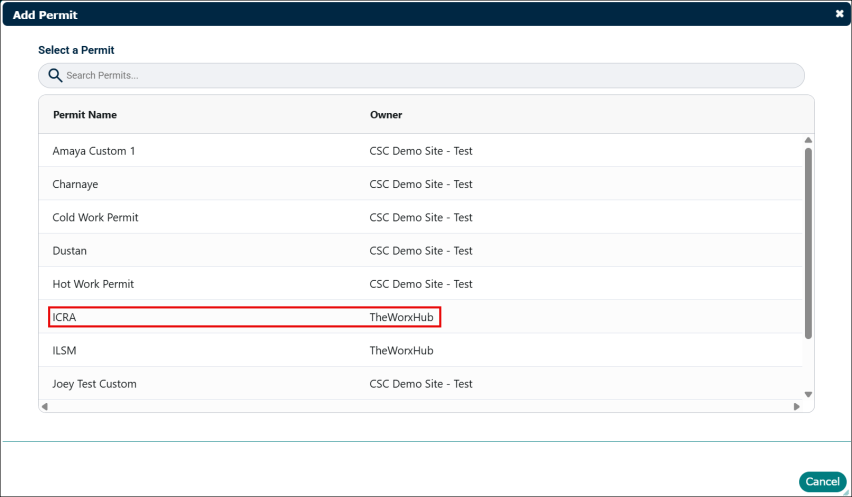
The Add Permit screen appears. Click the permit name you want to add, for example, “Cold Work Permit”.
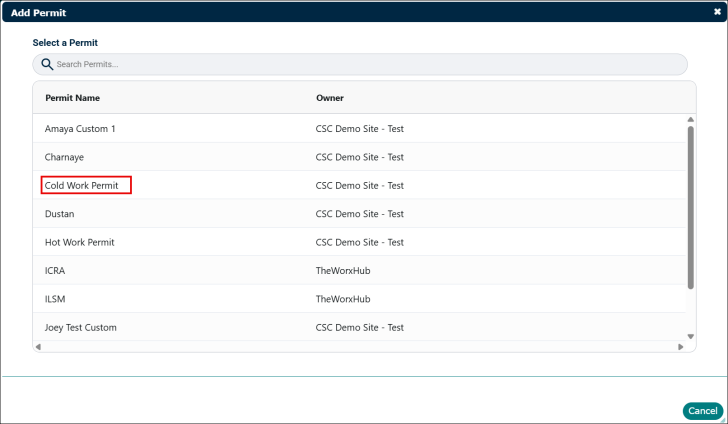
-
Complete the required fields, then click Next.
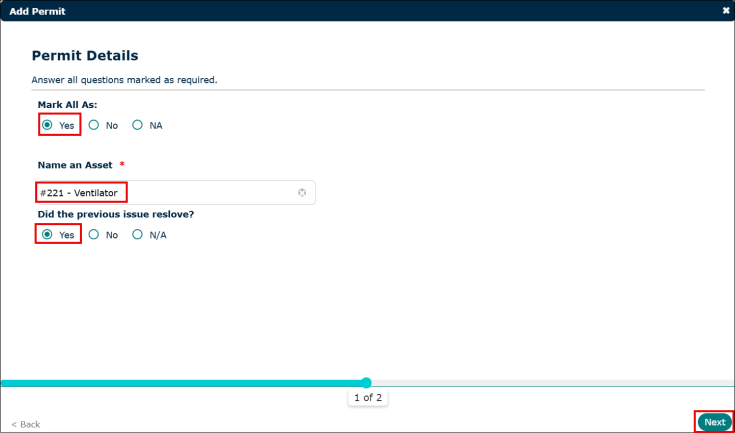
-
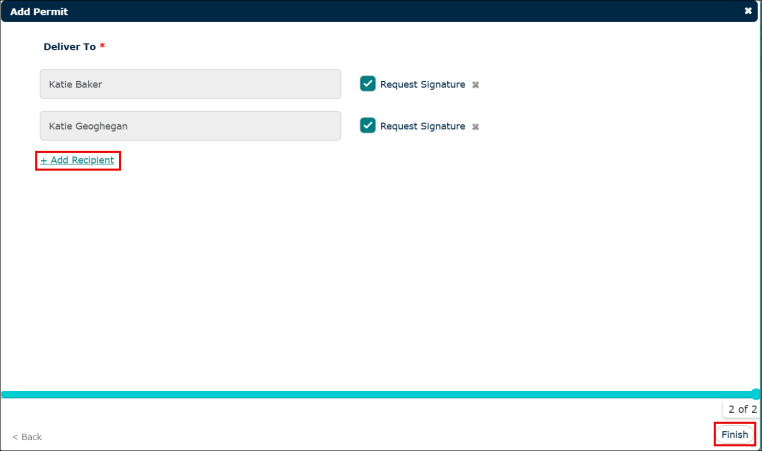
Click + Add Recipient, if needed.
Deliver to fields are auto populated with the data you entered while adding the custom permit.
NOTE You cannot assign the permit to yourself.
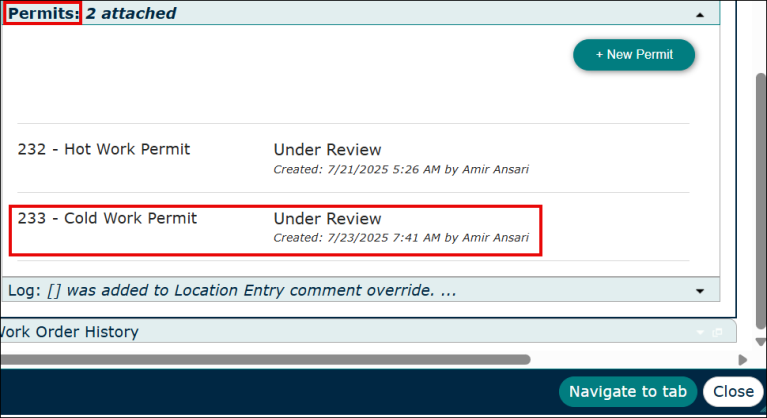
-
Your permit will appear under the Permits section of the work order, with the information of who created it and when.
WORXIQ
-
Corporate users will have the ability to control all permitting settings at the WorxIQ level. Any setting at the WorxIQ level will be locked or limited at the site level.
/Compliane Pro-12_956x398.png)
-
Custom Questions: Corporate users can allow their child sites to create custom question beyond what is defined at the WorxIQ level by selecting a flag within the Custom Question space.
/Compliane Pro-13_1003x293.png)
Adjustments and Approval Process
1. Date Range and Asset Details: Enter to capture the timeframe and assets.
2. Multiple Locations & Custom Questions: Add or adjust locations or assets as required.
Creating Permits
-
Go to Dashboard, click Work Order, and then select + New Permit button.
/Compliane Pro-14_883x523.png)
-
The Add Permit screen appears. Click ICRA or ILSM.
-
The Add Permit screen appears. Complete the following fields on the Type section, click Next.
NOTE If a location like a patient room is inherently riskier, adjust the primary risk level accordingly (e.g., medium to high), with justification for tracking purposes.
-
Type of Work: Select the work types (A, B, C, or D) from the drop-down menu and enter the description in the next white blank box (highlighted in yellow).
-
Risk level of the location assigned: Select the level of risk from the drop-down menu.
-
This location affected by: Check mark (Dust, Vibration, Noise, or/and Other) boxes for a better understanding of potential hazards.
-
Other location(s) affected: Select the affected location. You can add multiple locations by clicking on + Add location.
-
What is this location affected by: Check mark (Dust, Vibration, Noise, or/and Other) boxes for a better understanding of potential hazards.
-
Final assessment risk level: Select the level of risk from the drop-down menu and enter the description in the next white blank box (highlighted in yellow).
/Compliane Pro-16_928x546.png)
-
-
Complete the following available mandatory fields on the Assessment section, click Next.
-
Example:
-
Is the work being completed withing 30 days:
-
Entity Completed the work:
-
Is there anything else relevant to this permit you’d like to mention:
-
/Compliane Pro-17_929x553.png)
-
-
Complete the following fields on the Additional Questions section, click Finish.
-
Click Show More down arrow key to read the class description.
-
Click + Add Control if needed. The following screen appears. Enter the information that need to complete as a part of the permit.
/Compliane Pro-18_912x98.png)
-
Deliver To: Assign roles or specific individuals for permit. *
NOTE You cannot assign to yourself.
-
Toggle Signature Requested based on whether the approver needs to take direct action or simply receive notifications.
-
Click + Add Recipient if needed.
/Compliane Pro-19_1032x611.png)
-
-
The permit is submitted. A dialogue box “Permit created successfully” appears.
/Compliane Pro-20_322x71.png)
-
Repeat Steps (2-6) for ILSM permit.
Approval Flow and Sequential Processing
-
Sequential Review: Permits are sent in designated order, ensuring efficient multi-step approvals.
-
Permit Denial: A denial returns the permit for adjustments.
Tracking History and Managing Revisions
-
Access each version of a permit under View History to see modifications, who edited, and when. This history feature aids in accountability, traceability, and audit readiness.
-
Minor edits (like typos) are tracked without requiring re-submission, allowing efficiency while maintaining accurate records.
Permit Review and Approval Process
-
Approve or Deny: Based on permit accuracy and completeness.
-
Edit: Minor changes are allowed without re-issuing the permit, reducing delays.
-
Approval workflows allow approvers to make minor edits directly, streamlining collaboration and expediting approvals for minor adjustments.
Advanced Permit Management and Workflow Adjustments
-
Reassign Approvers: Adjust the approval order if a designated approver is unavailable.
-
View Permit History: Access full permit history and results.
-
Dedicated Permit Page: A separate Permits page shows all permits and offers a print-friendly version for on-site posting.
